How to Install a Car Stereo Step by Step?
Replacing a factory radio can transform a daily drive, but the process is rarely plug-and-play. A stubborn trim clip can hide behind one screw. A forgotten ground wire can create noise. This guide, “How to Install a Car Stereo Step by Step,” treats those details as important, not minor.
The opportunity is substantial. S&P Global Mobility reported that the average U.S. vehicle age reached 12.5 years in 2023. Many owners keep older cars while upgrading their technology. Grand View Research valued the global automotive infotainment market at approximately $24 billion in 2022. It also projects strong growth through 2030. These figures reflect broader infotainment systems, not only replacement radios. Still, they show why practical car stereo installation knowledge matters.
Veteran car-audio educator Richard Clark often emphasized, “The installation is more important than the equipment.” That principle guides every step here. You will learn how to confirm vehicle compatibility, disconnect the battery safely, identify speaker wires, fit a wiring harness, and test each function before reassembly. Small checks prevent expensive mistakes. Very expensive.
The instructions focus on sound quality, secure connections, and preserving factory features such as steering-wheel controls. They also encourage patience. Plastic panels may flex. Wiring colors may differ. Online diagrams can be incomplete. That is where careful inspection matters more than confidence. I should admit one weakness: no general guide can predict every dashboard design. Use the vehicle’s service information when available, and stop when a connection feels uncertain. A clean installation should look deliberate, operate reliably, and remain reversible.
Assess the Car Stereo System and Gather the Required Tools
Before installing a car stereo, assess the vehicle’s existing system carefully.
Check whether it uses a single- or double-sized dashboard opening. Measure the space, then compare it with the replacement unit’s dimensions.
Inspect the wiring behind the dashboard for brittle insulation, loose connectors, or previous repairs. Take clear photos before disconnecting anything. This simple record can prevent confused reconnection later.
Listen for current problems, including weak speakers, static, fading, or a faulty display. A stereo may not be the real cause. Power issues can imitate audio faults, so test the battery voltage with a multimeter.
Disconnect the negative battery terminal only after saving any necessary vehicle settings. But check the vehicle manual first.
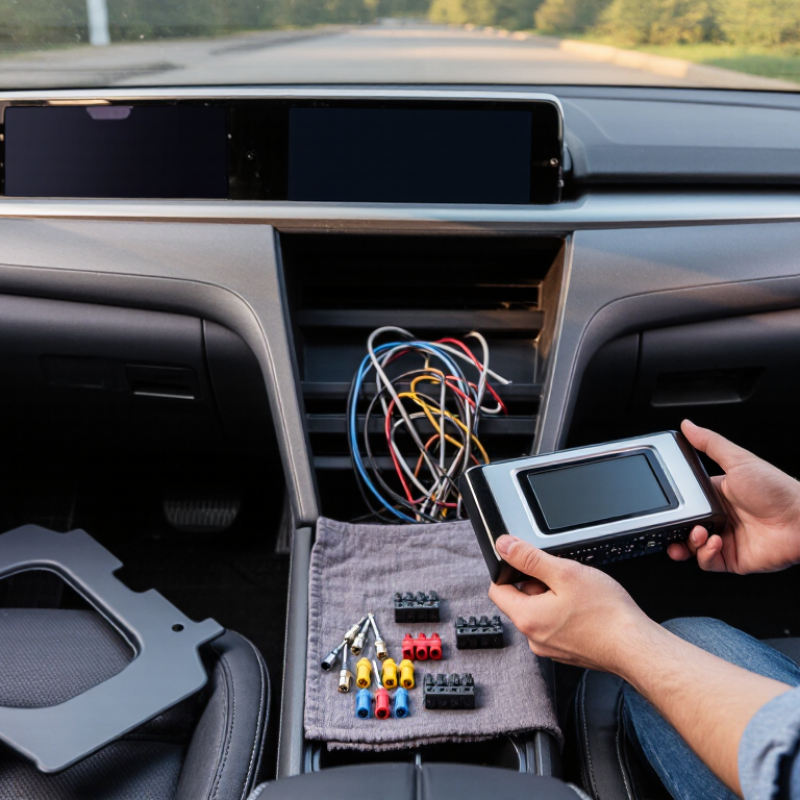
Gather insulated screwdrivers, trim removal tools, a wire stripper, crimpers, electrical tape, and a digital multimeter.
Prepare a socket set for mounting bolts and a flashlight for the dark dashboard cavity.
Use a wiring adapter when possible, rather than cutting factory wires. Match each wire by function, not by color alone. Vehicle wiring colors vary. A service manual or reliable wiring diagram provides stronger evidence than guesswork.
Lay small screws in a labeled container, because one missing fastener can create a rattle. Wear eye protection when working beneath the dashboard. Keep the ignition off during wiring, and never test unknown wires casually.
I once underestimated dashboard clips; forcing them would have caused damage. Pause when a panel resists.
A careful assessment often saves more time than hurried installation.
Disconnect the Battery and Remove the Existing Stereo
Park on level ground, switch off the ignition, and remove the key. Keep the key away from the vehicle. Open the service manual and locate the battery’s negative terminal. Use an insulated wrench to loosen the clamp, then secure it away from the post. Do not disconnect randomly. Some vehicles require a waiting period before electrical connectors become safe to handle. Follow the specified interval, especially when airbags or advanced safety systems are nearby. NFPA’s U.S. Vehicle Fire Trends report estimates about 209,500 vehicle fires annually from 2018 to 2022. Careless wiring deserves respect.
Remove the trim slowly with a plastic pry tool. Start at a seam, release one clip, and check for hidden screws. I once rushed this step; the panel later rattled for weeks. That was avoidable. Photograph each connector before unplugging it. Label unfamiliar cables with masking tape, and pull connectors by their housings, never by their wires. J.D. Power’s 2024 U.S. Initial Quality Study recorded 49.1 infotainment problems per 100 vehicles, making this system the most reported problem category. Clean installation matters. Before removing the existing stereo, check whether a security code, steering-wheel control module, or factory amplifier is present. Place removed screws in a small tray, because one missing fastener can create an irritating dashboard vibration.
Prepare the Wiring Harness and Mounting Components
Before installing the stereo, disconnect the vehicle’s negative battery terminal. This prevents accidental shorts while you prepare the wiring. Compare the stereo’s wiring diagram with the vehicle connector carefully. Wire colors can vary between vehicles, so never rely on color alone. Match each function, such as power, ground, speakers, and illumination. A vehicle-specific wiring harness adapter usually makes this work safer and cleaner.
Strip only a small amount of insulation from each wire. Use proper crimp connectors or solder joints with heat-shrink tubing. Loose connections may cause noise, flickering, or complete failure later. I once left one speaker connection slightly loose, and the sound cut out whenever the dashboard vibrated. Check polarity before wrapping the harness. Keep the wires away from sharp metal edges and moving controls. Do not force the harness behind the stereo.
Tips: Label every wire. Test before mounting. Leave service slack.
Prepare the mounting sleeve, brackets, or trim panel according to the dashboard design. The stereo should sit level and remain secure without excessive pressure. Connect the prepared harness, antenna lead, and any required control cables. Reconnect the battery temporarily and test power, speakers, memory, and steering controls. If something fails, switch off the system before inspecting connections. I sometimes expect a quick installation, but careful testing usually prevents a second dashboard removal. Secure the harness with suitable ties, then install the stereo and trim components gently.
Install and Connect the New Car Stereo
How to Install a Car Stereo Step by Step?
Install and Connect the New Car Stereo
Park on a level surface and switch off the ignition. Disconnect the negative battery cable before touching any wiring. Remove the trim carefully with a plastic tool, not a screwdriver. This prevents scratches and broken clips. Take a photo of the original connections before removal. It can save time later. Check the vehicle’s wiring diagram and the stereo’s installation guide. Wire colors are not universal, so never rely on color alone.
Match the vehicle adapter to the new stereo’s harness. Connect constant power, switched power, ground, speakers, and any required antenna lead. Use proper crimp connectors or soldered joints with heat-shrink insulation. Loose connections can cause noise, memory loss, or sudden shutdowns. Keep wires away from sharp metal edges and moving pedals.
My first installation looked tidy, but one weak ground caused intermittent sound. I had to remove the unit again. Test every function before securing the stereo.
Reconnect the battery and turn on the ignition. Check audio from each speaker, balance, fade, display, buttons, and steering controls if supported. Confirm that the stereo saves settings after switching the vehicle off. Listen for buzzing with the engine running. If a fuse blows, stop and inspect the wiring instead of installing a larger fuse. Slide the stereo into place only after all tests pass. Secure the trim gently and confirm it does not rattle during a short drive.
Test Every Function and Secure the Stereo in Place
After wiring the stereo, reconnect the battery and test every function before tightening the dashboard. Check power, memory retention, radio reception, Bluetooth calling, microphone clarity, USB charging, and each speaker channel. Use the balance and fade controls to isolate sound from every corner. Confirm that steering-wheel controls respond correctly, if equipped. Test the display in daylight and darkness. Small faults become difficult to reach later.
NHTSA reported 3,308 distracted-driving deaths in 2022. A stable interface matters. Keep volume controls responsive, and verify that hands-free audio does not interrupt safety alerts. I once missed a loose ground because the speakers worked briefly. That mistake taught me to test the system for several minutes, not seconds. Then inspect every wire for tension, sharp bends, or contact with metal edges. Secure connectors with proper insulation and leave enough slack for future servicing.
Slide the stereo into its mounting sleeve only after confirming alignment. It should sit flush, without rattling when the dashboard is tapped. Follow the vehicle-environment principles in ISO 16750, which address vibration, temperature, and electrical stress. S&P Global Mobility reported that the average U.S. vehicle age reached about 12.6 years in 2024, so retrofit installations must tolerate years of road vibration. Tighten fasteners evenly, refit the trim carefully, and perform one final function check. Do not assume silence means success.